A backyard rink is the best seat in the house for a Canadian winter. It is also easy to get wrong. The families skating by the holidays are the ones who measured their yard in late summer, ordered supplies early and flooded only when the cold was ready for them. This guide walks through the build in the order you will face it: timing, temperature, size, surface, cost, liner, filling and keeping the ice smooth.
Three things decide your season
- Start earlyGround work before frost, water only after steady cold.
- Pick the right surfaceLiner rink, synthetic ice or dryland tiles.
- Build ice in thin layersThin coats make hard, fast, smooth ice.
The Backyard Rink Timeline
Everything that involves the ground happens before frost. Everything that involves water happens after sustained cold. A synthetic ice rink skips the freeze entirely and is ready the day the tiles are clipped together.
| Month | What to do | Why it matters |
|---|---|---|
| August | Pick the spot, measure, check the slope, choose liner or synthetic ice | Dry ground is easy to survey and you are ahead of the fall rush |
| September | Order boards, brackets and liner, or order tiles | Rink supplies sell through in October and November |
| October | Level the site, cut back growth, build and stake the frame | Ground work is far easier before the first hard frost |
| November | Finish the frame, stage the liner, plan lighting and hose access | Digging and levelling get hard once frost sets in |
| December | Lay the liner and fill once temperatures hold below freezing | Filling too early wastes water, too late shortens the season |
How Cold Does It Have to Be to Skate?
Water freezes at 0°C (32°F), but the real question is how long after filling you can skate. That depends on the build and the weather. With a white liner, light-coloured boards and ground that has had time to cool, these are the numbers to watch:
Cold nights do the work. You build more ice overnight than mild days, around +2°C (36°F), can melt, so the sheet gets thicker every night. Keep the deep end at no more than 25 cm (10 in) of water.
Will a Backyard Rink Kill My Grass?
It does not have to. A white liner with the flood method is the safest combination for your lawn. Clear liners, blue tarps, black liners and flooding the bare grass all raise the odds of dead patches in spring, from too little sun, too much sun or a soaked root zone.
How Big Should a Backyard Rink Be?
Go as big as your space and budget allow. The most common regret from rink builders is not making it bigger. If you are unsure how much you will use it, start smaller and expand later with the same boards.
Plywood and most board materials come in 4 and 8 ft (1.2 and 2.4 m) sections, so dimensions divisible by four go up fastest and waste the least. Adult skaters cover 9 m (30 ft) in a stride or two, so a rink built for them needs more length.
Does My Yard Have to Be Level?
No yard is flat, and it does not need to be. You need to know the slope before you buy anything. Water finds its own level, so every centimetre of slope becomes extra depth at the low end. Measure first and you will not end up with a deep end that tops your boards and a shallow end with no water.
Look at shade and access while you are out there. A spot shaded by the house or trees holds ice through mid-winter thaws, while full afternoon sun can turn a rink to slush. You also need a hose that reaches, light for evening skates and a path that does not track mud onto the ice.
Liner Rink vs Synthetic Ice vs Dryland Tiles
This choice shapes everything else, so make it in late summer.
| Surface | Skate on it | Needs cold weather | Season | Best for |
|---|---|---|---|---|
| Liner rink | Yes | Yes | Late Dec to late Feb in most of Canada | The classic flooded rink and the biggest skating area |
| Synthetic ice | Yes | No | Year round | Skating and edge work on your own schedule |
| Dryland tiles | No | No | Year round | Shooting, passing and stickhandling in shoes |
Liner Rink
A frame, a poly liner and water. When winter cooperates, nothing beats it for size and glide, and it is the lowest cost per square foot. The trade-off is weather: you depend on steady freezing temperatures, and a mid-winter thaw can cost you weeks.
Synthetic Ice
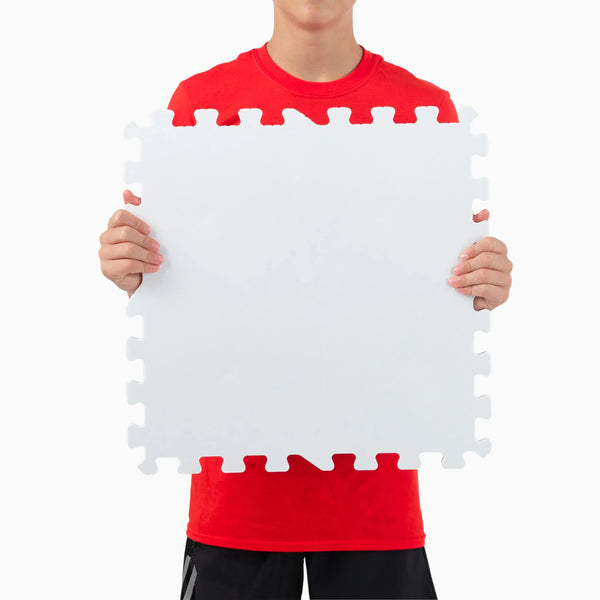
Synthetic ice takes the weather out of the equation. HockeyShot's Revolution synthetic ice tiles clip together into a surface you can skate in October, April or a January thaw. The self-lubricating surface needs no wax or liquids, and the extra resistance makes every stride a little more work, which helps players who train on it.
Dryland Tiles
For players who care more about pucks than skating, All-Star dryland flooring tiles give a slick surface for shooting and stickhandling in shoes. They are weatherproof and work in a garage or basement all year. Plenty of families run a liner rink in winter and tiles the rest of the year.
When Should I Build My Rink?
Build just before the weather turns. You want the frame ready when the cold arrives, and it is far easier to drive stakes into soft ground at 10°C (50°F) than into frozen soil.
Prepping a Liner Rink
Mow the footprint short and clear rocks, roots and anything that could puncture the liner. Check levels again with stakes and a string line, then build the low end tall enough for your target depth. Brace corners and long spans and stake everything solidly. Keep the liner indoors until you fill, so it does not collect debris and sun damage through November.
Prepping for Synthetic Ice
Tiles flex enough to handle uneven ground, but a flatter, firmer base glides better. A patio, compacted gravel or level firm ground all work. Clear and sweep the area and make sure water drains away from the surface instead of pooling under it.
When Should I Fill My Rink?
Let the forecast decide, not the calendar. Put up brackets and boards before the ground freezes, then lay the liner two to three weeks later. That gap lets the frame freeze in and the grass go dormant. Fill when the forecast shows the cold nights described above.
How Much Does a Backyard Rink Cost?
There is a rink for almost any budget, from a garden hose and your time to a full refrigeration system.
Packed Snow
Where it gets cold and stays cold, pack the snow, spray it to slush, let it freeze and build thin layers on top. It costs time, not money.
Starter or Complete Kit
Brackets, liner and kickplates get you going. You add plywood boards, and the hardware lasts for years. The liner is the only part you replace.
Synthetic Ice
Priced per tile, so cost scales with your footprint. Start with a training pad and add tiles later. See what a synthetic ice rink costs.
A refrigeration system with coils and a compressor all but guarantees ice, but it is the most expensive option and raises your power bill. One more note: a liner that does not survive the season is a yearly cost. Tiles are a one-time purchase that comes back out of the garage every year.
Liner Rink Build Checklist
How to Choose a Rink Liner
The liner is the most important part of an outdoor rink. Everything else lasts 10 to 15 years or more. The liner is the part to get right.
- Colour
- White on both sides. It reflects sunlight to keep the ice cold and protects the grass. Clear, black and blue tarps are known grass killers.
- Material
- Solid poly made to hold water. Woven tarps look thick, but only their thin coating holds water, and once it wears through they leak.
- One piece
- Buy the size you need in one piece, with no seams to fail.
- Edges
- Protect the inside edge at ice level with kickplates. Sticks, skates and pucks nick an unprotected liner in one season.
- Lifespan
- A good liner with protected edges lasts about two to five years. A regular poly liner usually lasts one to three.
How Thick Does the Ice Need to Be?
Aim for 10 cm (4 in) of finished ice at the shallow end. The deep end depends on your slope: with a 20 cm (8 in) pitch, you have 30 cm (12 in) of water on the deep side. A 10 cm base is a solid start and usually carries the ice through mid-winter thaws.
Should I Fill the Rink All at Once or in Layers?
With a liner, fill it all at once. Installing a liner takes 30 to 45 minutes, while building ice by spraying layers can take weeks. Fill to 10 cm (4 in) at the shallow end and let it freeze. That first ice is soft and bubbly, like pond ice. Thin top coats during resurfacing turn it into the hard ice you want, as long as the cold holds.
How Much Water Do I Need?
Multiply length by width by average depth. A 20 × 40 ft rink averaging 4 in deep holds about 267 cubic feet of water, roughly 7,500 litres. A sloped yard raises the average depth, so plan for more. For resurfacing, use as little water as you can.
How to Resurface Backyard Ice
Pick the method that fits your rink. The rule behind all of them: thin coats freeze solid, thick coats trap water and lift the surface.
- Flood
- Cover the whole rink before any of it freezes. You need big hoses and good pressure. Never flood smooth ice, it ruins the surface.
- Spray and squeegee
- Spray, then push water toward the low spots. Stop before it starts freezing or you leave frozen ridges to scrape off.
- Thin spray layers
- Spray a spot until it is glossy, then move on. Slow, but it gives the best glass finish.
- Hand resurfacer
- Lays a thin, even coat in a fraction of the time with less water. The practical choice for a big rink used every day.
Why thin coats matter: water freezes from the top down and expands. A thick coat freezes on top first and traps water underneath, which then expands upward and lifts the new layer into bumpy "shale ice." Thin coats freeze solid with no trapped water. Hard, layered ice is faster, chews up less and needs less upkeep.
Fixing Common Backyard Rink Problems
Why is there water around the edges of my rink?
Liner rinks freeze from the top down and rarely freeze all the way through, so there is water under the ice, mostly at the deep end. When several skaters crowd one corner, their weight pushes the ice down and forces a little water up at the edge. It usually retreats or freezes on its own.
How do I deal with slush?
If the ice is too thin to walk on, do nothing. Let the snow push the ice down until it all turns to slush, let it freeze, then resurface. If the ice is 13 cm (5 in) or thicker, clear the slush with a few helpers and do not stop until it is all gone. Anything left behind freezes into footprints and shovel marks.
How do I fix cracks in the ice?
Pack snow into the crack, wet it lightly, smooth it with a puck or a trowel and let it freeze. Then add several thin layers of water when it is cold enough to hold them. Harder layered ice cracks and chips less.
Start Planning Your Rink
Pick your surface first: a liner rink for the classic winter build, or tiles for ice on your own schedule. Then measure your footprint and note the slope, shade and hose route before you order anything.
Ready to build? Shop Synthetic Ice Dryland Flooring